Transactions
Transactions are the core input of Expenses — every expense, income, and transfer you log shapes your financial capacity in real time. The Add Transaction sheet is the fastest path to keeping your data current.
add_circle Adding a Transaction
Tap the + button (bottom-right corner) from anywhere in the app to open the Add Transaction sheet. It has three tabs:
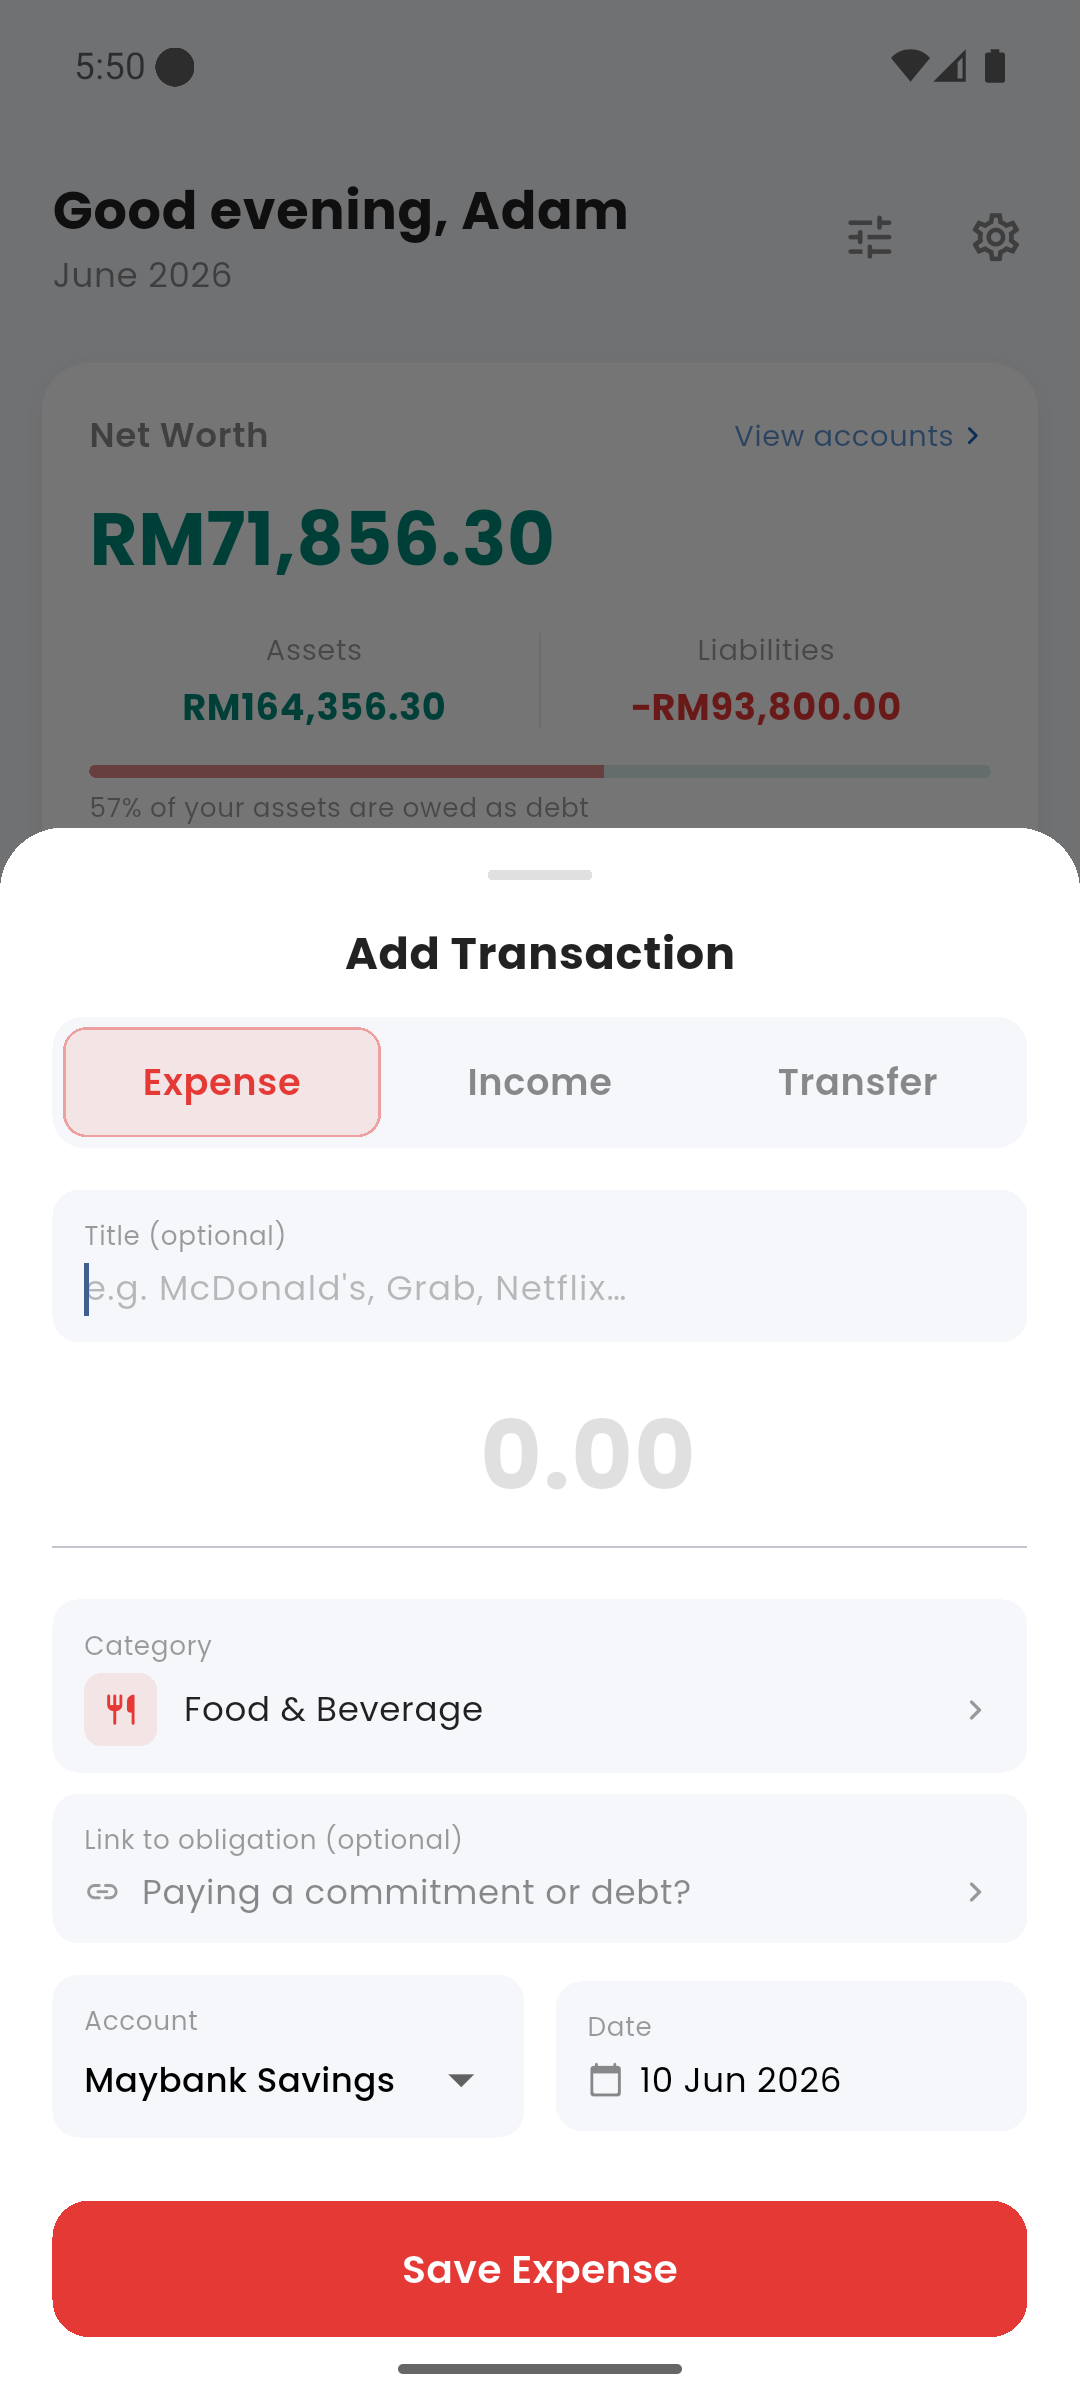
Add Transaction — Expense tab with Link to Obligation field
Expense tab
Fields: Title (optional label, e.g. "McDonald's"), Amount, Category, Link to obligation (optional — see below), Account, Date. Tap Save Expense to confirm.
Income tab
Fields: Title (optional), Amount, Category (income source), Account, Date. Income transactions increase the selected account balance and count toward the cycle's income total.
Transfer tab
Move money between your own accounts. Fields: Amount, From Account, To Account (swap button between them), Note (optional), Date. Transfers do not count as income or expense — they only shift the balance between accounts.
link Link to Obligation
On the Expense tab, the "Link to obligation" field lets you associate a manual payment with an existing commitment or debt. When you tap it, a picker lists all your active unpaid commitments and debts for the current cycle.
Selecting an obligation does two things automatically:
- Marks the commitment as paid for this cycle (removes it from the Upcoming Bills card)
- For debts: reduces the outstanding debt balance by the payment amount
This is the recommended way to log a payment when you've paid an obligation manually (e.g. bank transfer, direct debit) rather than using the Pay button inside the Commitments or Debts screen. The result is identical — no double-counting occurs.
Linking to an obligation marks the transaction as structured. Structured transactions are excluded from the discretionary "Spent" total and from budget category tracking, since they are obligation payments — not spending.
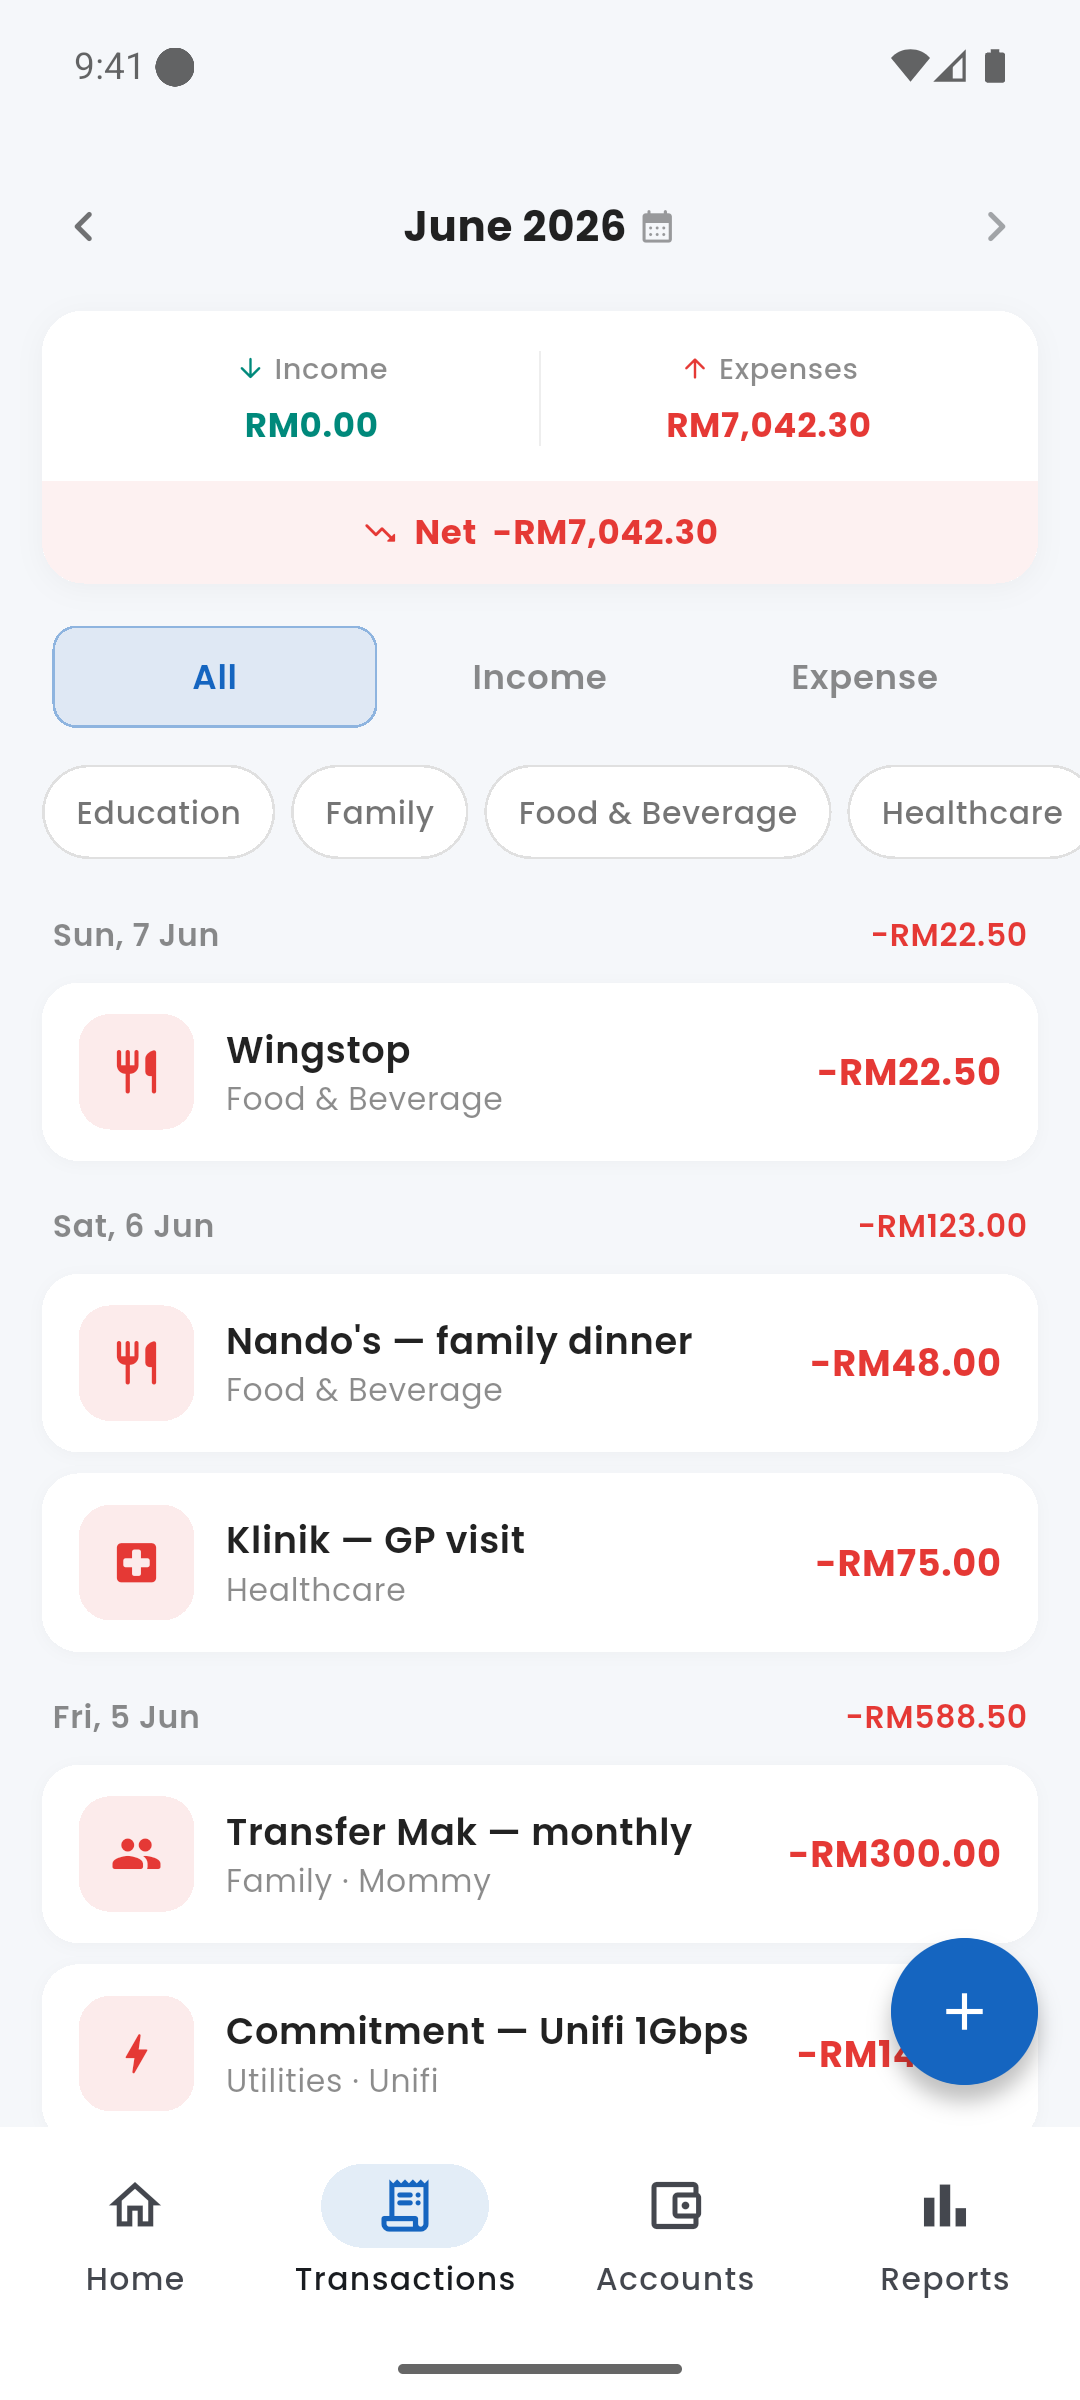
list Viewing Transactions
The Transactions tab (second icon in the bottom navigation) shows all logged transactions in reverse chronological order. Each row shows a category icon, title, account, date, and amount — colour-coded red for expenses and green for income.
Transaction list — swipe left to delete
filter_list Filtering
Tap the filter icon at the top of the Transactions screen to filter by: date range, account, category, or transaction type (expense / income / transfer). Filters stack — you can combine multiple at once. Active filters are indicated by the filter icon changing colour.
delete Deleting Transactions
Swipe left on any transaction row to delete it. A brief Undo snackbar appears for 5 seconds — tap it to restore the transaction immediately.
Transactions cannot be edited after creation. Delete the incorrect entry and log a new one.
For structured transactions (linked to a debt, commitment, savings goal, or lent money record), a confirmation sheet appears before deletion because removing them has side effects — for example, deleting a debt payment restores the outstanding balance.
link Structured Transactions
Some transactions are created automatically by other features and carry a special marker. You'll encounter them when you:
- Mark a commitment as paid → creates an expense linked to that commitment
- Record a debt payment → creates an expense that also reduces the debt balance
- Log a savings contribution → creates an expense linked to that savings goal
- Create a lent money record → creates an expense that debits the lending account
- Record a lent money repayment → creates an income that credits your account
Structured transactions are excluded from the Spent total in the Monthly Breakdown and Reports, and do not count against budget category limits — they are obligation flows, not discretionary spending.